Turning Your Bathtub into a Walk-In Shower
Turning your bathtub into a walk-in shower is a stylish and practical update for any home. Not only will it make your bathroom feel larger and look more modern, for any mobility-related issues this update will help make their bathing routine much easier. If you’re on the more handy side, consider DIYing this bathroom update, just follow this step by step guide to shower conversion.
Decide on a Curbed or Curbless Walk-In Shower
When you’re DIYing your tub to shower conversion, we recommend using a shower stall kit. Kits are relatively simple for a DIYer to install on their own, and come in a variety of styles, including options you can tile to match the rest of your bathroom. But first, you need to choose: curbed or curbless.
Curbed vs. Curbless Shower Stall Kits
| Curbed Shower | Curbless Shower | |
| Description | Shower pan forms a complete enclosure using low curbs you must step over to enter the shower. | Shower pan sits flush with the floor with no enclosures. |
| Pros | Most common type of walk-in shower and the easiest to install. | Easily accessible for anyone with mobility issues. Increasingly popular due to their visual appeal. |
| Cons | Could pose the same problems as your old bathtub for those with mobility issues. | Pricier and require more work to install than curbed options. |
| Avg. Cost | $600-$950 | $1800-$2900 |
Determine Spacing & Placement
Converting a tub to a shower is easiest when you situate your new walk in shower in the space left behind by your tub, since your drain lines and water supply will already be in place. Moving plumbing will add significant cost to the project and require you to hire a plumber.
Spacing Required for a Walk-In Shower:
- At least 30 inches by 30 inches of floor space.
- At least 80 inches in height.
- At least 15 inches between the side of the toilet and the shower wall.
- Or at least 21 inches between the front of the toilet and the shower wall.
- If you plan to install a swinging door, make sure to account for the swing.
Gather Your Materials
Once you’ve determined spacing for your new walk-in shower, it’s time to get down to the dirty work. You’ll need these materials before starting:
- Plywood for floor protection
- Screwdriver / Screw gun
- Wrench and/or Allen wrench
- Putty knife and utility knife
- Drywall saw or reciprocating saw
- Prybar
- Jigsaw
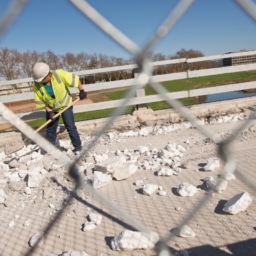
During your remodel, you may end up with more debris than your usual trash can handle. Consider renting a 10 yard dumpster to get rid of your old tub and other debris.
Remove Tiles & Wall Sections
Before beginning a bathtub to shower conversion, you’ll need to remove some of the tile and drywall around your tub in order to tear it free. Follow these steps for help:
- Cover floor with plywood to prevent tile damage.
- Turn off water to the bathroom at your home’s main water shut-off valve.
- Unscrew the drain cover, overflow drain cover, and faucet knobs. Pull the faucet from the tub, using an Allen wrench to loosen any screws.
- From the access panel behind your tub, or from your basement, disconnect the main and overflow drains by using a wrench to turn the locking nuts counterclockwise.
- Remove the tile around the tub to a height of about 8 inches by scoring the grout with a utility knife, then prying them off with a putty knife.
- Cut through the drywall with a drywall saw, being careful not to cut into any studs. If your wall is plaster, use a reciprocating saw for this step.
Remove the Tub
Finally it’s time to remove the tub! Follow these steps to remove your bathtub:
- Remove any nails or screws attaching the tub to wall studs.
- Use a utility knife to cut through any caulk between the tub and the floor.
- Use a prybar to pry the tub a few inches from the wall.
- Working with a helper, use your prybar to pry up one end of the tub and maneuver it upright. Ensure it will fit through your doors this way, first!
- Alternatively: cut through the middle of the tub with a jigsaw to separate it into two pieces. Pry each piece up and maneuver it until you can slide it out of its space.
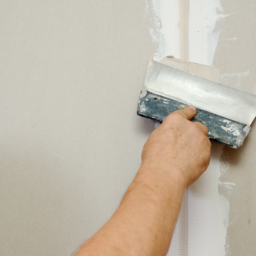
- Toss the old tub into your dumpster, then repair the drywall you cut away.
Install Your Shower
Follow the specific instructions given to you in your shower stall kit. If you chose to convert to a curbless walk in shower, you will want to keep in mind that you must lower the floor of the shower so that the shower pan will sit flush with the rest of the bathroom floor. If your bathroom has a slab subfloor, you will need to hire a concrete contractor for this step, fortunately this is typically a quick job that won’t be costly.
Once you’ve finished these steps you should be looking at a brand new walk in shower unit! Remember during your remodel you’ll have leftover debris and a bathtub to dispose of. Call us at Dumpster Rental Inc to rent a 10 yard container that will be perfect for handling your bathroom remodel debris!