Remodeling Your Bathroom From Start to Finish
Remodeling your bathroom may seem like a huge job, but the benefits make it worth it! Remodeling your bathroom is a great way to give your home a little face lift. Before you start picking out which soaker tub is best for you, you’ll want to know exactly what you’re getting into.
Check out our step-by-step guide below to learn how to complete your bathroom remodel from start to finish:
10 Steps to Remodeling Your Bathroom
Step 1: Picking the Perfect Bathroom Design
Before you begin any remodeling, you need to choose a design that fits both your vision and skill set. If you’re an experienced DIYer you have options of what jobs to choose from, whether you swap out the vanity or gut the room entirely.
Here are some elements you’ll absolutely need to figure out before you start renovating your bathroom:
- Color scheme: Do you want your bathroom to be clean and light? Then whites and creams are for you! Maybe shades of blues and gray’s are more your style? Whatever your color preference is, knowing ahead of time is important to ensure your tiles don’t clash.
- New fixtures: Will you replace or remodel your shower/tub? Are you installing a new sink or light fixtures? Replacing one or both of these fixtures will add to your project time and budget.
- Storage spaces: Where will you keep your towels and toiletries post-remodel? If you’re removing a closet to expand the space, you’ll want to including shelving or cabinets in the new design.
- Location of utilities: Do you know where the electrical wiring and plumbing pipes are located? Make sure you have accurate measurements for each of these so you don’t end up needing expensive repairs. If you’re unsure, consult with a professional plumber and electrician.
Step 2: Gather Your Tools & Supplies
The materials and tools you’ll need will vary based on your renovation plans. But a few essential tools and supplies to have on hand for any bathroom remodel include:
- Safety mask
- Gloves
- Goggles
- Caulking gun
- Silicone sealant
- Hammer
- Tape measure
- Spackle knife
- Spackle
- Stud finder
- Power drill
- Pry bar
- Bucket
- Chisel
- Adjustable wrench
- Flathead screwdriver
- Hacksaw
- Utility knife
- Chalk line
- Extension cord
Optional tools we recommend:
- Wet-dry Shop-Vac
- Very handy in case any water spills while removing the toilet or other fixture.
- Cordless Drill
- Makes it easier to move around and frees up your extension cord for other power tools.
Step 3: Remove or Demolish Bathroom Fixtures
Assuming you’re partially or totally renovating your bathroom, this is where you’ll start removing drywall and any fixtures you’re replacing. Demolishing a bathroom yourself isn’t all that hard, but there are a few steps you should follow to avoid any costly mistakes.
How to Demolish a Bathroom Before a Total Renovation:
- Start by draining and removing the toilet to avoid any unpleasant spills.
- Next, cover up the bathtub and start removing the tile down to the studs. This is necessary in order to rework the plumbing to fit your new shower/tub design.
- Remove the insulation from your walls where necessary. Do not use a hammer on insulation, instead use a reciprocating saw to cut out the panels. A safety mask, gloves, and goggles are a necessity.
- Finally, remove cabinets, vanities, mirrors, floor tiles and any other features you plan to replace.
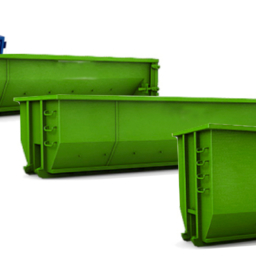
Keep in mind, you’ll need to dispose of the demolition debris. Renting a dumpster for your demolition debris will allow you to dispose of everything at once without having to drive to the local dump, cutting hours off your project time.
Step 4: Installing Your New Fixtures
After you’ve demolished your bathroom, its time install your new fixtures. For a shower or tub replacement, you’ll want to pick a pan or basin that fits your new decor, as well as the space where your current tub sits. In terms of shapes, you generally have three choices:
- Rectangular
- Square
- Pentangle (base with one corner cut off)
The base you choose will determine your layout, so make sure you take into account the other features of your bathroom beforehand, including the location of the door. You could also consider installing a combination shower and bath tub if you have the space. Keep an eye out for any signs of rotting wood or water damage to your subfloor. If you notice any rot you should replace it before installing anything to prevent further damage.
Step 5: Make Adjustments for New Fixtures & Features
Once the the shower is out of the way, you can now install your new vanity and cabinets. If their dimensions are bigger or smaller than your current ones, you’ll need to renovate your bathroom a little further by adjusting the wiring.
For the most part, that means moving the GFCIs (Ground Fault Circuit Interrupters) and other power outlets so that they line up with your new vanity and cabinets. We recommend calling a licensed electrician for this step, especially if you have never worked with home wiring before.
Step 6: Lay Down Your New Floor Tiles
A bathroom makeover is not complete without new floor tiles. After you’ve adjusted your utility lines, it’s time to lay down some fresh tile. But before you start grinding away with the grouting, use a mason’s chalk line to mark reference lines perpendicular (90-degree angle) to the wall with the longest continuous line. This will allow you to keep your tiles in a straight line, avoiding the dreaded crooked tiling job.
Step 7: Hang New Drywall & Start Painting
Now your bathroom makeover is starting to take shape. The next step is to hang your new drywall. This can be a long process as you have to cut new drywall to fit around your vanity and any other features. But once you start nailing up the boards you should be able to move briskly. A few important do-it-yourself bathroom remodeling tips to keep in mind during this step:
- Use drywall mud and tape to cover seams and fill in gaps.
- Use cement board instead of drywall for the shower/tub wall.
- Coat the cement board with Redgard or another waterproofing membrane to guard against water damage.
After you’ve put your walls back together you can start adding some color to your bathroom. It is best to use paint with a semi-gloss finish that is resistant to mold and mildew.
Step 8: Hook Up the Toilet & Add the Finishing Touches
Now your bathroom actually resembles a bathroom, except for one thing: the toilet. You could install or re-install your toilet earlier in the process but leaving it for last helps avoid chipping it while working on other areas of the bathroom. The absolute last finishing touch is installing the trim around the room and mirrors. The trim is the capstone for every bathroom remodel as it provides the last bit of detail your bathroom needs to feel complete.
We hope you found this guide helpful when remodeling your bathroom! Remember, during your remodel you’re going to have a ton of debris that will need to be disposed of. To save yourself not only money, but time, contact us at Dumpster Rental Inc!

